Sep 232014
 

sliced chicken breast on a white plate with greens in background and tomato balsamic sauce on top


Making a pan sauce is one of my favorite things to do when I’m cooking. It’s quick, easy, delicious and finishes off the dish nicely. Plus, it forces you to let the meat rest while you make the sauce, and letting the meat rest is so important to keep it juicy and moist. But wait… there’s more… making a pan sauce is like doing half the dishes - by deglazing, you clean off the bottom of the pan as you incorporate all those tasty brown bits into the sauce AND making the sauce doesn’t make a second pan dirty. It’s a win-win-win-win!

Need a little tutorial on making a pan sauce once you’ve finished cooking your steak, chicken, pork or fish? It’s super easy. You just need to remember three (or maybe four) things:

  • Add Flavor: You start by adding some onion, shallots, garlic, and/or herbs to give the sauce some flavor.
  • Add Liquid or something acidic: This will be the main flavor of the sauce - wine, stock, juice, tomatoes
  • Let it Reduce: The flavors need time to concentrate and blend and the sauce needs to thicken slightly, so let the mixture simmer and reduce for 2 or 3 minutes, or until you feel it looks and tastes right.
  • Finish the Seasoning: After you taste it above, you might think it’s perfect or you might think it needs something - a pinch of salt, a nub of butter to mellow it all, a squeeze of lemon to brighten it. Season it up and serve it!

Here’s a 10-minute lesson on making a pan sauce:


Chicken Breasts with Tomato Balsamic Sauce

Serves 4

Ingredients:

  • 4 (6-ounce) chicken breasts
  • salt and freshly ground black pepper
  • olive oil
  • 2 shallots, thinly sliced
  • 1 clove garlic, smashed
  • ¼ cup balsamic vinegar
  • 2 cups cherry tomatoes, quartered (or chopped fresh tomatoes)
  • ¼ cup chopped fresh parsley or basil leaves

Directions:

  1. Pre-heat a large non-stick skillet over medium-high heat and season the chicken with salt and pepper. Add olive oil to the skillet and sear the chicken breasts, cooking for about 3 to 5 minutes on each side (depending on thickness), or until firm to the touch. Remove from the skillet and set aside.
  2. Add the shallot and garlic to the skillet and cook for two minutes. Add the balsamic vinegar and simmer until it has almost disappeared. Immediately add the tomatoes and toss well. Cook until the tomatoes soften slightly – just a minute or two. Toss in the basil or parsley and season to taste with salt and pepper.
  3. Pour over the chicken and serve.


Sep 092014
 
This is not the chipotle chickpea chicken chili, but it does look good, doesn't it?  ;)

This is not the chipotle chickpea chicken chili, but it does look good, doesn’t it? ;)

I always take a vacation at the end of the summer. It’s a time of year that I love. Not only is the weather usually perfect - not too warm but still warm enough - but the end of summer and beginning of autumn feels like a new year to me, a new beginning. Maybe that’s because my birthday falls at the end of August, so September and the fall really IS a new year for me. I’m also a sucker for any change of seasons and how that affects our cooking and what we eat. It’s ironic that in the summer, when we have more time and the pace is slower, we tend to cook quickly or not at all. We grill, have cool salads, sandwiches, burgers. Autumn begs us to slow cook, braise and spend more time preparing meals, but we’re suddenly short on time with work to get done, school to return to, etc…

That’s why pressure cooking can be such a coup in the fall and winter. It gives us the great flavors and aromas that we’re seeking from braising, but it does it in one third of the time it would usually take on the stovetop or in the oven. I also love that a pressure cooker can forgive us for our forgetfulness or lack of preparation. It can cook root vegetables in minutes, make soups and stews in no time, and if we’ve forgotten to soak beans for chili, it can do it in five minutes for us. That’s how I was able to make one of my favorite chills - Chipotle Chickpea Chicken Chili - the other night in just minutes, using raw chickpeas. I was craving a delicious chili and the pressure cooker came to my rescue. It’s like having a kind, compassionate and forgiving friend in the kitchen to help you out, and I love having someone on my side during the beginning of the busy new year!

You can see a video of me and my friend making this chili here… on my brand spankin’ new Youtube channel!


Looking for a good pressure cooker? You can see me demonstrating a 6 quart electric digital pressure cooker all day on QVC on Wednesday, September 10th. Tune in!

Chipotle Chickpea Chicken Chili

Serves 8

Ingredients:

  • 2 cups dried chickpeas
  • 1 to 2 tablespoon vegetable oil
  • 3 pounds chicken, breast or thigh or a combination of the two, cut into bite-sized pieces
  • 1 yellow onions, chopped
  • 2 ribs celery, chopped
  • 2 large carrots, chopped
  • 3 bell peppers (red, green, yellow, orange or a combo), chopped
  • 3 large cloves garlic, minced
  • 2 to 3 chipotle chilies in adobo sauce, chopped
  • 1 teaspoon dried ground cumin
  • ½ teaspoon smoked paprika
  • 1 tablespoon chili powder
  • 1 tablespoon salt
  • 1 (28 ounce) can tomatoes
  • 2 cups chicken stock
  • 2 tablespoons cornmeal
  • ¼ cup fresh cilantro, chopped
(or parsley)

Directions: Continue reading »

May 032014
 

Despite some rainy weather, grilling season is in full swing for me here in Pennsylvania. It feels so good to be outside, enjoying the weather again, cooking meals and making great backyard aromas. I’ve been testing out all sorts of accessories for the BBQ lately, and most recently I had the good fortune to take a whole new grilling system for a test drive. Overall, the STOK grill and grill insert system is pretty darn cool! STOK is really on to something here. They create both gas and electric grills and their grills have removable circles in the grill grate that can be replaced with one of their inserts, like a griddle, a vegetable basket, a cast iron kettle, a smoker infuser, a wok, a pizza stone and even a chicken roaster! I’ve had a lot of fun playing with this grill system, and as I write this, I can’t even decide which insert is my favorite.

That said, anyone who knows me, knows how much I love pizza! So one of the first things I did with the STOK grill Pizza1 system is throw the pizza stone into place and fired up the grill. I used the pizza stone in the grill to make a Tex-Mex Pizza, which ended up being a lot like nachos on a pizza crust. The best part was being able to grill some of my pizza toppings - corn, red pepper, and chicken - for extra smokey flavor while the pizza stone was still heating up. Then cooking the pizza on the grill’s pizza stone allowed me to have one of my favorite meals without heating up the house with the oven. I’ll be showing you more recipes from my experience with STOK in the next little while, but for now, here’s the Tex Mex Pizza recipe. Yum!

Tex Mex Pizza

Makes 2 9-inch pizzas

close up shot of the pizza with avocado, chicken and red pepper visible

Ingredients:

  • 1 chicken breast
  • chili powder
  • 1 ear corn
  • olive oil
  • 1 red pepper, sliced into thin rings
  • ½ red onion, sliced into strips
  • 1 pound pizza dough, divided into two balls and at room temperature
  • ¼ cup shredded mozzarella cheese
  • ¼ cup shredded pepperjack cheese
  • salt and freshly ground black pepper
  • ¼ cup tomato salsa
  • 1 avocado, thinly sliced or diced
  • chopped fresh cilantro

Continue reading »

Nov 192012
 
a whole roast turkey on a white platter with oranges and herbs around it.

@ Bochkarev Photography

It’s the monday before American Thanksgiving and the plans for this thursday’s meal are under way. As I write this, the turkey stock is simmering on the stovetop and the turkey brine is cooling on the counter. I’ve been brining my Thanksgiving turkeys for several years now. It’s easy to do and really does result in a deliciously moist turkey. All you need is a little forethought and some room in your refrigerator.

To brine your turkey just means to submerge it in a salty solution over a period of time. What happens when you brine is all science. The brine works to flavor the turkey through the process of osmosis. The salty solution initially draws moisture out of the turkey, but then, the salty solution gets drawn back into the turkey, taking along with it all the great flavors of whatever you’ve put into the brine. The salt denatures the cells of the turkey meat, making them better able to hold moisture. And so, after some time in the brine, those cells can actually hold 10 - 15% more water than they did before brining.

There are a couple of simple ratios to remember when you’re brining.

  • Use 1 cup of table salt (or 1.5 cups kosher salt because kosher salt has a higher volume by weight) for ever 1 gallon of water you need to cover the turkey.
  • Brine the turkey 1 hour for every pound of turkey.

At it’s most basic level, a brine could consist of just water and salt, but since you’re going to the effort of brining, why not put some other flavors in there that will help season the center of your Thanksgiving plate? Here’s what I use in a brine: Continue reading »

Sep 062012
 

A row of all the different colored ceramic casseroles with the rooster design - tan, blue, red and green

Many years ago, a friend of mine gave me a ceramic rooster to keep in my kitchen. I think at first I said “Thank you,” and then I thought “Huh? That’s weird.” She simply told me that every kitchen should have a rooster in it for good luck. I put the little rooster on a shelf and didn’t really think about it for a long time.

Then one day, when I was moving and packing up the kitchen, I wondered about the rooster again. Continue reading »

Jun 242012
 

close up shot of a burger on a bun with tomato, avocado, mayonnaise and sproutsWhat’s better in the summertime than a good burger straight off the grill? How about a great burger straight off the grill that has less saturated fat, is high in protein, has a delicious flavor, is made of all natural ingredients and doesn’t leave you feeling like you over ate? That’s what I was lucky enough to discover recently from my friends at Rastelli Foods. I was down at the Rastelli location in Southern New Jersey a few months ago and tasted their All Natural All Breast Meat Turkey Burger. I was blown away - super juicy, delicious with a true turkey flavor, unbelievably juicy, subtly seasoned and SO JUICY! It was far and away the best turkey burger I had ever had! Continue reading »

Jan 292012
 

"Be Prepared" etched in a piece of metal


When I was a little girl, my older brother was a boy scout. One day, the scouts were able to bring family members to a meeting and I was invited to go along. I loved every minute of it and promptly decided that I was going to be a boy scout when I grew up too! That, of course, didn’t quite happen - I became a brownie instead - but, the main message of the boy scouts was not lost on me - “Be Prepared”. That’s a good motto and one that I’ve taken to heart.

When I worked as a line cook, whether at the Zuni Café and Café Rouge in California, The Commons in Vermont, L’Oustau de Baumanière and La Cabro D’Or in France, or even Bistro Delight in Kingston, Canada, I would cook for up to 400 people a day (and sometimes I’d spend 6 hours doing it), and being prepared was the only way to accomplish that feat. These days I find that most of the meals I cook are for one or two people, with the occasional dinner party some nights. That’s quite a contrast, but being prepared is still a part of my kitchen life.

Sometimes I really do miss working on a line in a restaurant, but it’s not because I miss the large quantity of food I used to cook. I miss the excitement and the rapid pace of it all and the access to all the equipment and ingredients that comes along with working in a restaurant kitchen - the preparedness of a professional kitchen. One of the easiest ways for me to create a sense of preparedness in my own kitchen at home is to make batches of foods that I can freeze and have at the ready in the future. It’s great to know that you have meals ready to heat up either for yourself, or for spontaneous guests.

The biggest difference between cooking for a few or cooking for a crowd is really just in buying the ingredients. Once you have all the ingredients, it takes almost the same effort and almost the same amount of time whether you make a lot of food or make a little. Most people I know feel that time is their most valued commodity, so with that in mind, it makes sense to cook a lot of food at one time, making lots of meals to save for a day when you have no time at all. It makes sense to “Be Prepared”.

This week, I decided to really value my time and not only made a big batch of food, but also used a pressure cooker to do so, taking one third of the time it would have otherwise taken. Fast AND easy! I made Chicken à la King - basically chicken pot pie without the crust. Making a big batch of this and freezing individual portions lets me have a chicken pot pie any night of the week. All I have to do is heat up my leftovers and just bake off a round of puff pastry or a large biscuit to plop on top. I love being prepared.

Chicken à la King

Chicken à la King in a blue willow bowl with a circle of puff pastry on top

Serves 6 to 8

Chicken à la King is basically chicken pot pie without the crust. You can serve this as a pot pie very easily, however, by topping with a circle of baked puff pastry or pouring the chicken over a biscuit. This recipe is easily doubled for a super large batch.

Ingredients:

  • 1 tablespoon olive oil
  • 3 leeks, light green and white parts only, cleaned and sliced into 1-inch slices (or 1 medium onion, small dice)
  • 3 carrots, peeled and sliced ¼-inch thick
  • 3 ribs of celery, sliced ¼-inch thick
  • 3 cloves garlic, minced
  • 8 ounces button mushrooms, quartered
  • 2 bay leaves
  • 1½ teaspoons dried thyme leaf
  • 6 chicken breast halves, skinless, chopped into ½-inch dice
  • 2 cups chicken stock
  • 2 tablespoons butter, room temperature
  • 3 tablespoons flour
  • 2 cups frozen peas
  • ¾ cup half and half (or heavy cream)
  • 1 tablespoon lemon zest
  • 2 teaspoons salt
  • freshly ground black pepper
  • ¼ cup chopped fresh parsley

Directions:

  1. Pre-heat the pressure cooker on the BROWN setting.
  2. Add the olive oil and cook the leeks, carrots, celery and garlic until tender – about 7 minutes.
  3. Add the button mushrooms, bay leaf, thyme and diced chicken to the pressure cooker. Pour in the chicken stock, stir to combine and lock the lid in place.
  4. Pressure cook on HIGH for 8 minutes. While the chicken is cooking, combine the butter and flour into a paste (this is called a beurre manié). Set this aside.
  5. Release the pressure from the pressure cooker manually and carefully remove the lid. Turn the pressure cooker to the BROWN setting and add the frozen peas.
  6. Stir the beurre manié into the pressure cooker ingredients and bring the mixture to a boil to thicken. Turn off the heat. Add the half and half and season with the lemon zest, salt and pepper. Stir in the chopped fresh parsley.
  7. Serve as a stew over mashed potatoes, pasta, or rice; or serve in a bowl with a biscuit or baked circle of puff pastry on top.
Jan 222012
 

close up of BBQ Chicken wings

Confession: I’m not a big fan of football. I watch hockey.

Problem/tragedy: my beloved Montreal Canadiens are doing terribly this year.

Solution/only salvation: take a couple of weeks off from hockey and watch football for the end of its season.

I know so little about football that every year at this time, I have to ask people what teams are still playing. And then I ask them where those teams are from. Here’s what I do know about football:

  • It’s played in the Fall and Winter
  • The season is short because it gets too damn cold to watch it outdoors and for some reason they don’t play indoors even though roofs on stadiums have been around for years.
  • The best HD television cameras are used for football and the graphics are quite amazing - is that yellow line really on the field, and if it’s not, then how can people walk over it like it is?
  • Fans gather several hours beforehand in parking lots and eat food out of the trunks of their cars or off the tailgates of their trucks. Football food includes a lot of finger foods, probably because it’s hard to eat with a knife and fork in a parking lot.

That’s about it.

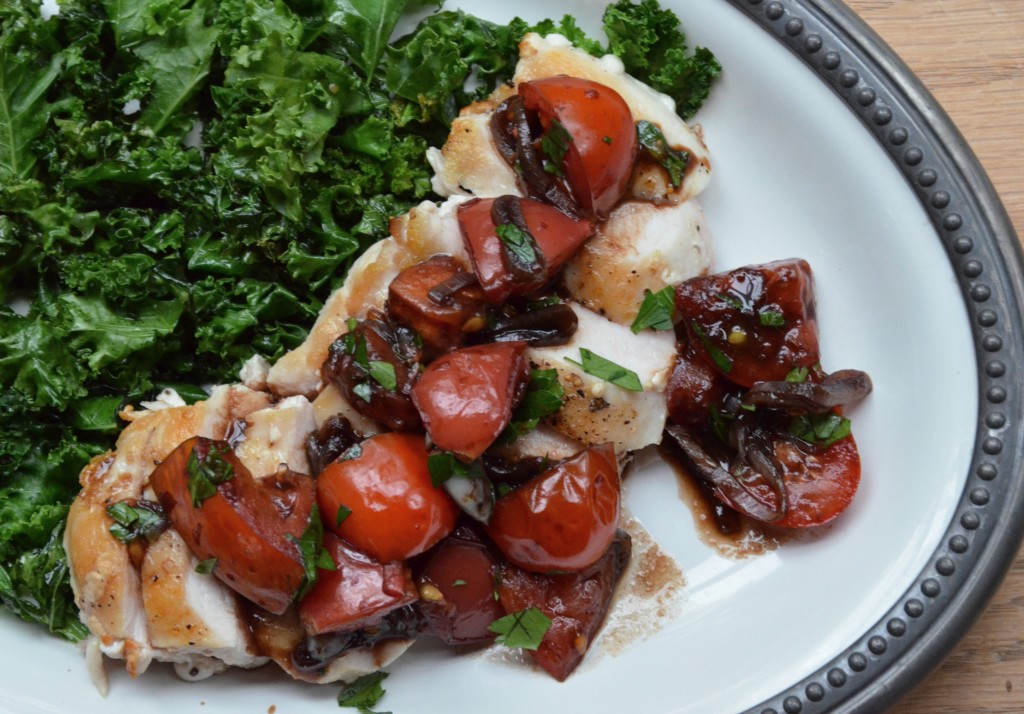
It’s the last point that makes me think that perhaps I could get into football for a couple of weeks. I love finger food! So, in preparation to watch football, I decided that this pre-game eating was critical to the enjoyment of the sport. I would make some finger food. The quintessential football finger food is, of course, “the wing”.

Traditionally, the wings served in conjunction with football are Buffalo Wings. When I was a little girl in Canada, I thought this was perplexing. What the heck’s a buffalo wing? Buffaloes do not have wings, and yet…(oh boy) Of course, Buffalo wings are not named after the animal, but after Buffalo, New York and refer to a deep fried chicken wing tossed with a butter and hot sauce mixture and served with celery sticks and blue cheese dressing. According to an official proclamation by the city of Buffalo, the Buffalo Wing was invented by Frank Bellissimo in 1964 at the Anchor Bar. However, in reading Calvin Trillin’s account of the history of the Buffalo chicken wing, I once again came across what I’ve always thought about culinary “discoveries” - that they can’t really be pinned down. People have been eating chicken wings for as long as they’ve been eating chickens. Whether it was the Bellissimo’s who first tossed fried chicken wings in hot sauce and butter, or someone else, really can’t ever be known. What can be known is that this preparation of wings became very popular in Buffalo, New York in the 1960s and 70s and Buffalo was credited with the dish. I also read that residents of Buffalo don’t actually call them “Buffalo Wings”, but just wings. (Sort of like the French when they talk about French fries.) I have no first-hand knowledge of whether or not this is true, but it’s believable.

So, as I chose to partake in the football craze leading up to the Super Bowl, I decided to make wings. After all, I’m sure eating the food is part of watching the game. I did not, however, feel like deep-frying, nor did I really want to eat spicy wings that would stain my fingers and create that big red circle around my mouth while my tongue searches for the blue cheese dressing to soothe the burning rage. I wanted a baked wing and I wanted a BBQ flavor. I also wanted a touch of smoke flavor in the wing, as though it was made at a BBQ joint, rather than in my kitchen. I went to work and came up with the Smoky Sir Kensington’s BBQ Chicken Wing recipe that you’ll find below.

The wings were easy easy easy to make and they were delicious and moist. The only trouble with my plan was my timing. I guess I should have made my pre-football game wings on Sunday afternoon, but I made the wings on Saturday night, coincidentally right before Hockey Night in Canada came on TV. Old habits die hard, and of course I watched the Canadiens game. As the playoffs get closer and the chances of Montreal being in those playoffs gets smaller, every night they play is a big game. I ate my wings with the game and the Canadiens won! Maybe there’s something so this pre-game eating after all.

At least now I’m ready for Football’s Big Game when it comes around. When is that?

Smoky Sir Kensington BBQ Wings

Glass bowl of BBQ chicken wings on red and white tea towel

This recipe uses two of my favorite ingredients - Sir Kensington’s ketchup (which you can read all about in a recent post here) and Gourmet Nut’s Smoked Sea Salt (the easiest and most natural way to get a smoky flavor into your foods). I’m a big believer that your finished meal can only be as good as your ingredients, and these ingredients make your finished dish a winner.

Makes about 30 wings

Ingredients:

  • bottle of smoked sea salt with white background3 pounds chicken wings
  • ½ cup all-purpose flour
  • ½ teaspoon smoked sea salt
  • freshly ground black pepper

BBQ Sauce:

  • 1 to 2 teaspoons vegetable oil
  • ¼ cup finely chopped onion
  • 1 clove garlic, minced
  • bottle of Sir Kensington's Gourmet Scooping Ketchup with white background1/8 teaspoon paprika (for a stronger smoky flavor, use smoked paprika)
  • 1/8 teaspoon ground cayenne pepper
  • ½ cup Sir Kensington’s Gourmet Scooping Ketchup
  • 1 tablespoon brown sugar
  • 2 tablespoons apple cider vinegar
  • dash Worcestershire sauce
  • ½ teaspoon smoked sea salt

Directions:

  1. Pre-heat the oven to 400º F.
  2. While the oven pre-heats, make the BBQ sauce. Heat a small saucepan over medium heat. Add the oil and sauté the onion and garlic until translucent (about 5 minutes). Add the paprika and cayenne and stir for about 30 seconds. Add the ketchup, brown sugar, cider vinegar and salt and bring the mixture to a simmer. Simmer for 5 minutes and then remove from the heat and set aside.
  3. Put the flour, smoked sea salt and black pepper in a zipper sealable plastic bag. Cut the wings into parts, discarding the wing tip and any excess skin.
    a hand holding a knife is cutting the drumette off the chicken wing

    First, cut the drumstick off the wing, cutting close to the meat of the drumstick.

    A knife is cutting away the flap of skin between the drumstick and the "flat" or middle segment of the chicken wing

    Next, cut off the flap of skin between the drumstick and the “flat” or middle segment of the chicken wing.

    Finally, cut the wing tip off the “flat” or middle section.

    In batches, shake the wings around in the bag to dredge them with the flour. Transfer the dredged chicken wings to a baking sheet lined with parchment paper (to make clean up easier) and bake for 20 minutes. Turn the wings over and bake for another 5 minutes.

  4. Transfer the wings to a bowl and toss with the BBQ sauce. Return the coated chicken wings to the baking sheet and cook for another 5 minutes. Remove from the oven and serve.
Nov 272011
 

The biggest meal of the year is over, and still it seems to keep going on and on … and on… for days! For many, Thanksgiving is all about the leftovers, and we cook so that there will be leftovers to enjoy, and we won’t have to cook for a few days. Well, that rarely seems to happen. You can only re-heat leftovers so many times before you’re yearning for something different. I, for one, like to have the Thanksgiving leftovers, but I never want them in the same form as the traditional turkey dinner. I like to create something different using the same ingredients so I don’t get bored with my meals.

This year (so far), I’ve made two different Thanksgiving leftover meals, and I thought I’d share them with you. The first is a delicious salad that I had for lunch on Friday. In this recipe, I used up some turkey, stuffing and brussels sprouts and made the dressing with some leftover cranberry sauce. It was light and refreshing and delicious. Then, for dinner on Friday, I made a turkey stroganoff. That saw the last of my gravy used up, some more turkey and though I chose to serve it over pappardelle noodles, you could pour it over leftover mashed potatoes and have an equally satisfying meal.

Happy Continuing Thanksgiving!

Turkey Cranberry Salad with Stuffing Croutons

a plate of salad with sliced turkey, croutons, bacon, cranberries showing

Serves 2

Ingredients:

  • 1/2 cup leftover cooked turkey stuffing
  • 2 - 3 ounces arugula (or any salad green)
  • 1 endive, sliced
  • 1/4 dried cranberries
  • 1/4 cup pecans
  • 1/4 cup leftover vegetable, cut into bite-sized pieces (I used Brussels sprouts, but you could use anything - green beans, roasted sweet potato…)
  • 1 cup leftover cooked turkey, shredded into bite-sized chunks
  • 1/2 teaspoon mustard (Dijon or whole grain)
  • 1 teaspoon white wine vinegar
  • 2 teaspoons cranberry sauce
  • 4 teaspoons olive oil
  • salt and freshly ground black pepper to taste
Directions:
  1. Pre-heat the oven to 375 degrees F.
  2. Spread the stuffing out onto a baking sheet and toast in the oven until browned and crispy - about 10 to 15 minutes.
  3. Combine the arugula, endive, cranberries, pecans, vegetables and turkey in a large bowl.
  4. In a smaller bowl, combine the mustard and white wine vinegar and mix until the mustard has dissolved. Add the cranberry sauce and mix again. Add the olive oil and stir to blend everything together. Season with salt and pepper.
  5. When the stuffing has toasted, add it to the bowl with the salad greens and toss everything with the cranberry dressing.
  6. Transfer to two plates and enjoy!
Turkey Stroganoff
pappardelle noodles with shredded turkey and green peas in a blue and white bowl

Serves 3 - 4

Ingredients:

  • 2 teaspoon olive oil
  • 1/2 onion, finely chopped
  • 1/2 pound egg noodle pappardelle
  • 1 cup leftover gravy (this dish is only as good as your gravy, so if you didn’t like your gravy, make the salad above!)
  • 1/2 cup frozen peas
  • 1 1/2 cups leftover cooked turkey, shredded into bite-sized pieces
  • 1 teaspoon chopped fresh thyme
  • 1 tablespoon chopped fresh chives
  • 1 tablespoon chopped fresh parsley
  • salt and freshly ground black pepper
  • 2 tablespoons sour cream
  • 1 teaspoon lemon zest (optional)

Directions:

  1. Bring a large stockpot of salted water to a boil.
  2. Pre-heat a skillet over medium-high heat. Add the olive oil and cook the onion until soft and translucent - about 8 to 10 minutes.
  3. Drop the pasta into the large pot of boiling water and cook until it is al dente, according to the package instructions.
  4. Add the leftover gravy to the skillet and bring to a boil. Add the frozen peas and leftover turkey and warm through. Add the fresh herbs and season with salt and pepper. Remove the gravy from the heat and stir in the sour cream.
  5. Drain the pasta and transfer to a large serving bowl. Pour the stroganoff mixture over the top. Season with more black pepper and lemon zest, if desired.
Of course, if you’ve exhausted your imagination with possible turkey leftover recipes, there is one last recipe that always pleases a crowd ….
a golden retrieve and a terrier mutt eating turkey and dog chow out of two dog bowls