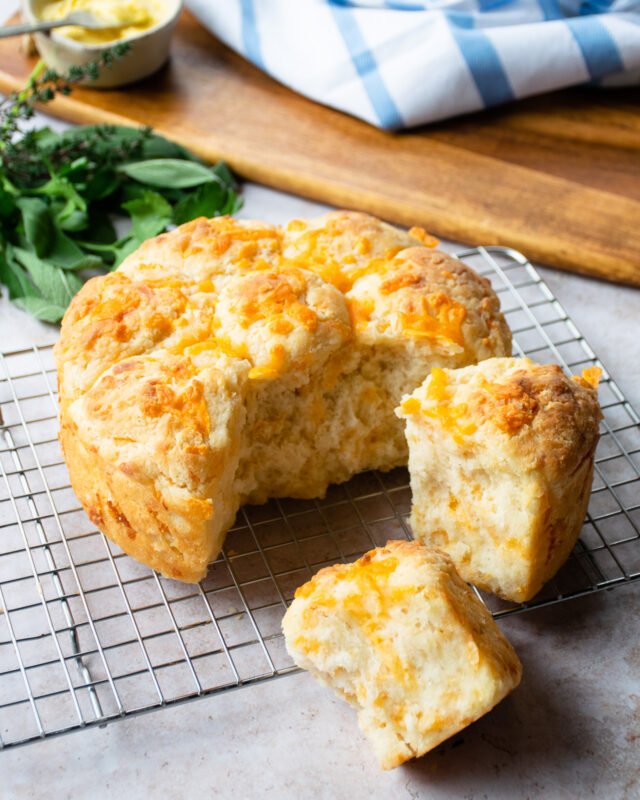
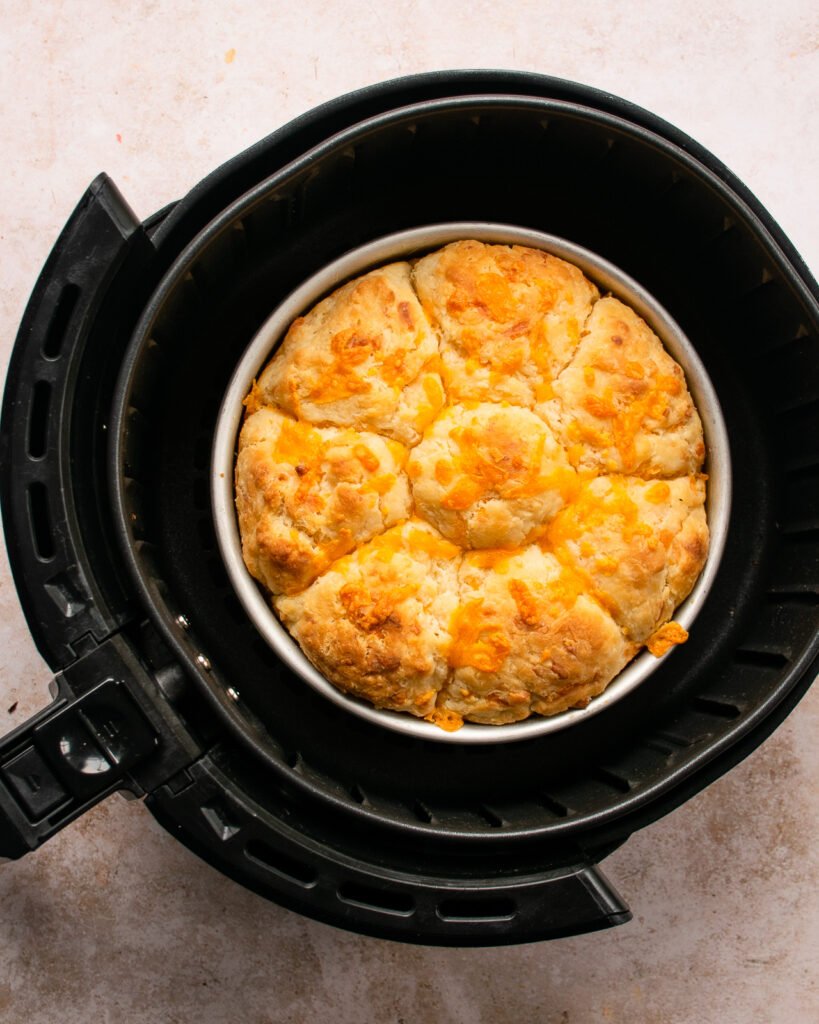
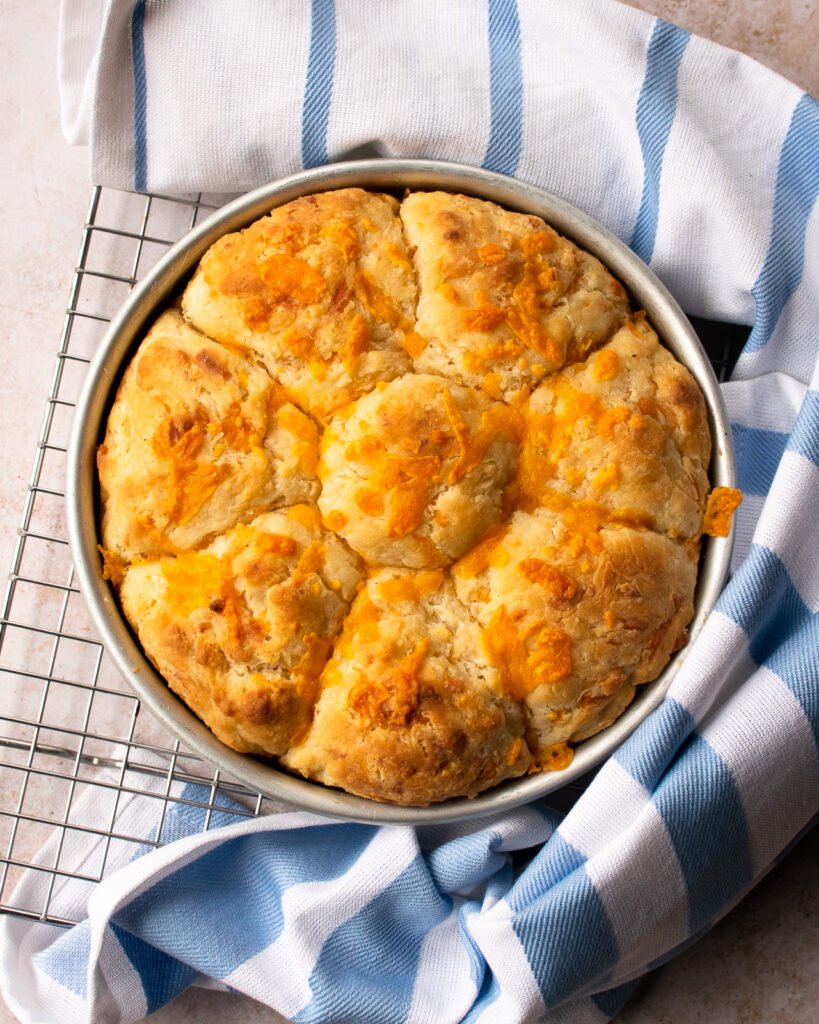
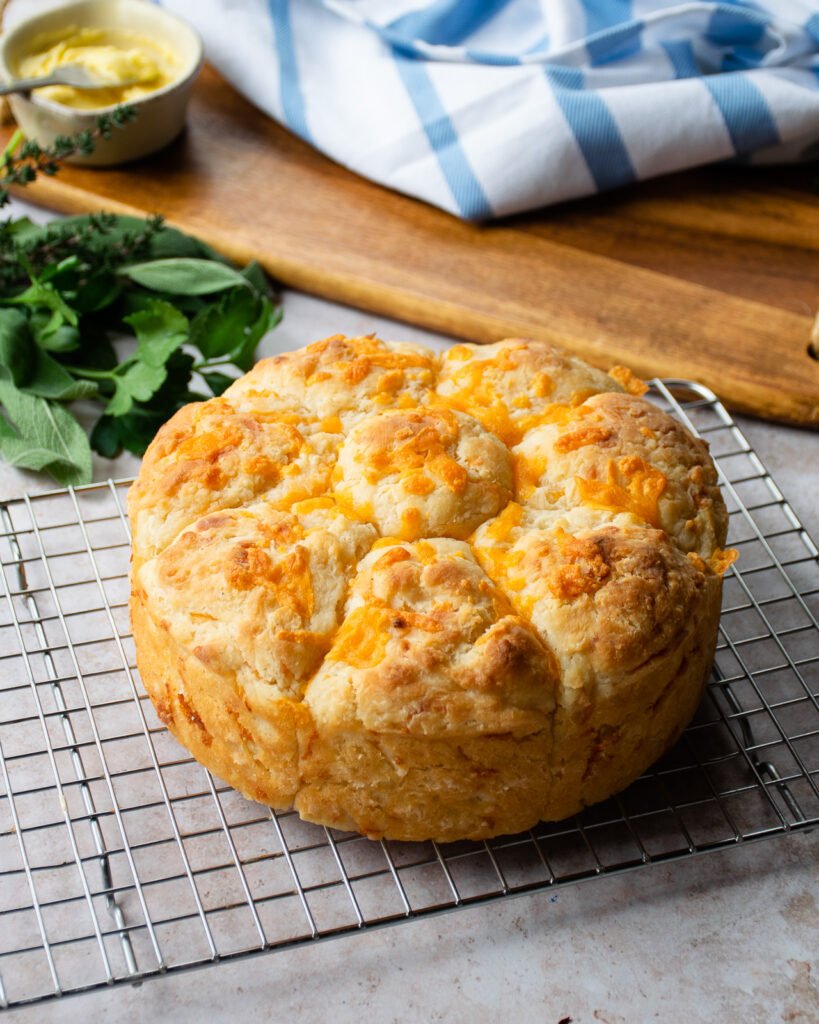

This recipe for Cheddar Cheese Biscuits in your air fryer requires a 7-inch cake pan (one that will fit into your air fryer), but you can make them in the oven instead if you prefer. Just follow the recipe for Buttermilk Biscuits.
Featured In My CookbookAir Fry Everything Jump to Recipe (or scroll for photos and riveting information...)Complete list of air frying cooking times and temperatures are listed in this chart. All times and temperatures assume that...View Technique
It is important to keep your air fyer in tip-top shape. Use the items below as guidance to continue making...View Technique
Many recipes that use traditional methods can be converted to delicious air frying creations!View Technique


How do you make self rising dough. I don’t buy it.
Hi Hope. To make self rising flour, for 1 cup of all purpose flour you will need to add 1 ½ teaspoons baking powder + ¼ teaspoon salt. For this recipe you can sift together, 2 1/3 cup AP Flour + 3 ½ teaspoons baking powder + ½ teaspoon salt.
Is it necessary to separate the dough into 8 parts or could you just fry/bake it like cornbread?
Hi there. You don’t have to separate the dough into parts – you could definitely bake it in a round pan if you like. I have a recipe for Cheddar Bacon Biscuit Bread that uses that concept in a loaf pan. https://bluejeanchef.com/recipes/bacon-cheddar-buttermilk-biscuit-bread/
ML
These are truly scrumptious! So moist and flavorful, and the slightly crispy edges are delightful! My hubby was over the moon about these biscuits, and that says a lot because he isn’t a huge biscuit fan to begin with. I have to say I was rather frazzled trying to grate the slightly frozen stick of butter because I have such hot hands on a regular basis! LOL By the time I got to the last 1/4 of the stick, I had to drop it and just cut up the remainder best I could. But it all turned out so great in the end. Definitely worth the little bit of frustration and mess. I give it two “hot” thumbs up. 😀
Do you have instructions for a conventional oven?
Hi Debra. Take a look at my buttermilk biscuit recipe (and video) for conventional oven directions. https://bluejeanchef.com/recipes/buttermilk-biscuits/
ML
Is there a substitute for buttermilk?
Hi Abraham. You can use yogurt, thinned with just a little milk. Or you can add lemon juice to whole milk. You can see instructions on that in the article here: https://bluejeanchef.com/recipes/buttermilk-biscuits/
I added cooked, crumbled bacon— yummy 😋